Showing posts with label recipe. Show all posts

09 December, 2020

Choc-chip shortbread

On Saturday morning over breakfast I indulged in some cookbook browsing. I was tired, but had high aspirations of getting some seasonal baking done. I came across a recipe in my collection that I'd never tried, but looked easy enough for a tired Saturday's baking. It's garnered high praise at home, and one of my Facebook friends asked for the recipe, so without further ado, here it is:

Ingredients
250g butter, softened
½ cup icing sugar, sifted
½ cup brown sugar
2 ¼ cups plain flour
¼ cup rice flour
150g choc bits

  1. Beat butter and sugars.
  2. Stir in the flours and choc-bits into butter-sugar mixture.
  3. If it's hot, you can wrap the dough in plastic wrap and rest it in the fridge for 30 minutes, I didn't need to do that with the room temperature around 18˚C.
  4. Shape spoonfuls of mixture into balls and place on tray. They didn't flatten in the oven, so I'd recommend squishing them a little.
  5. Bake at 180˚C for 12-15 minutes or until golden. My oven is "hot" so I used 170˚C for 12 minutes.
  6. Cool on the tray for a few minutes before transferring off the tray.


12 November, 2020

Hundreds and Thousands Slice

Most of us have favourite food memories from childhood. It's amazing how those memories stick with you. I love it that many of the sweet recipes I make have connections to various people who've been in my life over the years.

This is a recipe that my mum frequently made. I haven't made it so often over the years because coconut isn't the easiest product to source in Japan, but I've got some at the moment (thanks to iHerb), so I made these on the weekend. Yum!

Ingredients

½ cup (120g) butter
1 cup (210g) brown sugar
1 egg
1 cup (130g) SR flour (For non-Aussies, this is self raising flour and has baking powder included in it, very convenient!) If you arent' in Australia, just add a teaspoon of baking powder as well as the flour. For my Japan-based friends, I used "medium flour" or 中力小麦粉.
½ cup (50g) desiccated coconut
2 tablespoons of cocoa (20 ml spoons)
dash of vanilla essence

Icing
2 tablespoons cocoa
1 cup (130g) icing sugar 
3 (15g) teaspoons butter
1 tablespoon boiling water
hundreds and thousands

Method

1. Cream butter and sugar.
2. Add egg.
3. Add flour, coconut, cocoa, and vanilla.
4. Mix well (semi-dry mixture).
5. Spread evenly into a greased/baking paper-lined tin. I used a 23cm x 23cm tin.
6. Cook in a moderate oven for 20 minutes (about 170 or 180˚C depending on how fast your oven is).
7. Just before it finishes baking, mix icing ingredients together (except hundreds and thousands).
8. Ice while hot. Sprinkle hundreds and thousands on top.
9. Cut into squares when cold.

13 August, 2020

Ginger Slice

 I’ve got a blog post in the works about our holidays (now nearly two weeks ago!), but in the meantime, I posted a photo of the Ginger Slice I made on the weekend and there have been requests for the recipe.


 Here is it:

Base

60g (2 oz) brown sugar

115g (4 oz) butter

1 cup SR flour (1 cup of all purpose flour plus one teaspoon of baking powder)

1 teaspoon ground ginger

1. Cream butter and sugar, add flour and ginger.

2. Press into a flat tray (about 20 x 25 cm).

3. Cook in a moderately hot oven (about 180/190C) until golden brown.

Icing

140 g (5 oz) sifted icing sugar (powdered sugar)

60g (2 oz) butter

1 teaspoon ground ginger

2 teaspoons golden syrup (you could substitute another syrup here, maybe corn syrup)

1. Mix ingredients together in saucepan while base is cooking. Stir over low heat until thickened.

2. Pour over base immediately after you take the base out of the oven.

3. Cut into rectangles while hot.

16 April, 2019

Hot cross buns


Hot cross buns aren't readily available in Japan (though I've heard that some bakeries are starting to make them). So it's make-it-yourself or don't have any.

This is the recipe I used on Sunday. I printed it off the Australia Women's Weekly site some years ago and I can't find it there now, so I'm typing it out here for any of you who'd like to try it. Just don't substitute the sugar for salt like I did in my fatigue on Sunday. It simply doesn't work and cost me over 1/2 hour in lost time!

Ingredients

Buns

4 tsp or 14g dry yeast
1 tablespoon (20g) of sugar
1 cup or 250ml of warm milk

4 cups or 600g plain/cake flour
2 tsp of cinnamon
1/2 tsp salt
80g butter, chopped
1 cup or 160g sultanas or raisins (soak in warm water, if they are a bit too desiccated)
Optional: about 2 tablespoon of mixed peel (I used a peeler to take off the top layer of an orange's peel and then chopped it into small pieces)
1 egg, beaten slightly
1/2 cup of sugar
1/3 cup or 80ml warm water

Flour paste (makes crosses)

1/2 cup or 70g plain flour
1 tablespoon of white sugar
6 tablespoons of water (approximately).

Glaze

Brush with milk before applying crosses. 

Method

1. Sift the flour, spices, and salt into a large bowl.
2. Rub in the butter.
3. Make the yeast mixture:
  1. Combine the first three ingredients on the list: the yeast with the one tablespoon of sugar and the warm milk.
  2. Whisk until yeast is dissolved.
  3. Stand in a warm place until yeast mixture is frothy (5-10 minutes).
4. Into the flour mixture, stir the 1/2 cup of sugar, fruit, egg, and yeast mixture. Add enough water to make a soft dough.
5. Leave the bowl in a warm place for about an hour. My oven has a 40˚C setting. so I used that.
6. Turn the dough onto a lightly floured surface, and knead until it is smooth and elastic (recipe says 10 minutes, but it didn't take me that long).
7. Divide the dough into 20 portions, quickly roll them into balls and put them on the tray— gently touching, in a pan with sides, if possible.
8. Leave them to rise in a warm place for about 20 minutes.
9. Make flour paste by mixing together, gradually adding water until you've got a smooth, fairly liquid consistency.
10. Pipe the paste onto the buns, or use a plastic bag with the corner snipped off just a tiny bit.
11. Bake at 190C for about 15 minutes or until buns sound hollow when tapped.

They are so yummy, that I'm thinking of making another batch before Easter.

18 March, 2019

Mabodofu: one of the meals I cook in Japan

It's been ages since I wrote about the sort of food we eat here regularly (2011, before we had any teens, I did two posts—1 and 2—about a whole week of meals). Our meals aren't vastly different from what I'd cook in Australia. Generally, the biggest difference is that we have fewer cuts of meat to choose from and a few limitations on the ingredients that we can find or afford. I don't cook many Japanese dishes, mostly because I find they're often a bit fiddly and I struggle with the ingredient lists (poor excuse, I know). If you want to eat good Japanese food, my feeling is that you should go out and get the experts to do it. However, the upside of making Japanese food at home is that it's often very cheap, because, of course, you're using readily available ingredients that are cheaper.

But here is a meal I cooked recently—mabodofu—that is a fairly new addition to my repertoire. I call it a Japanese dish because it's common here, but it actually is Chinese.
Apparently, there are packet mixes readily available in the shops, but we are not fans of packet mixes, primarily because they are often too salty for us, but also, it's often cheaper and healthier to do it from scratch. And the below recipe is so fast, you might almost be making a packet mix! It took me about 20 minutes.

Someone gave me this recipe when I shared about finding one on my Facebook page a year or so ago:

Mabodofu

4 tablespoons of oil
4 tablespoons of chopped shallots (green onions)—I use much more than this
2 tablespoons minced garlic
1 tablespoon hot bean paste (pictured, for those in Japan looking for it, it's called トウバンジャンtoubanjan)
4 tablespoons low-salt soy sauce
dash sugar, pepper
2 tablespoons of wine or mirin
220g or more of tofu
300g or more of mince (US=ground meat)
1 tablespoon cornstarch, water

1. Heat four tablespoons of oil. 
2. Stir fry shallots, garlic, and hot bean paste until fragrant. 
3. Add meat and stir fry until cooked. 
4. Add soy sauce, sugar, pepper, wine, and tofu then bring to boil. 
5. Reduce heat to low and cook for three minutes.
6. If desired, add cornstarch to thicken. 
7. Remove and sprinkle with more green onions if desired.
8. Eat over rice.

Mine cooked for a little too long when I made it last week, I think. It was a little dry, but tasted just fine (except it was too hot for our tastes, but then I used double the amount of hot bean paste mentioned above). Because tofu is so cheap here, it is a good meal for the budget too!


06 September, 2017

Vegetable Nut Crumble recipe

Last night I baked a vegetarian dish that I found when I was a poor newly wed. I haven't made it, as far as I can recall, since we've had kids. But I brushed the cobwebs off the recipe last night and made it. 
Everyone liked it, except for the fact that I added capsicum. But they're big enough that they don't really complain anymore, though I have plenty of immediate feedback. One boy jokingly called it a "sand casserole" because it looked a bit sandy on top! Two of them just picked out the capsicum and left it on the side of their plates. In any case, you can play around with what vegetables you wish to include in this dish. I didn't use cauliflower, merely because I didn't find it in the two shops I looked in. I used corn instead.

I posted about it on Facebook, and as usual, someone asked for the recipe, so here it is. It's not a hard recipe at all.

Rice base
I used three rice-cooker cups of rice for this (about 180ml). But adjust to your size family.
Vegetable stock cube
2 eggs

1. Cook rice in water with stock cube. (I used a rice cooker)
2. Combine rice and raw egg, mix well.
3. Spread over base of baking dish (I used a large dish for my hungry family).

Vegetable layer
50g butter
1 onion, chopped
1 capsicum (bell pepper/red pepper), chopped
broccoli (I used about 300g), chopped
200g cauliflower (I used about 150g corn), chopped
150g small mushrooms, chopped
1 can tomatoes, mashed
mixed herbs (whatever you've got, Italian-type herbs)
pepper
1 - 1 ½ cups grated cheese

4. Melt butter in frying pan.
5. Add onion, cook until soft.
6. Add rest of vegetables and cook until tender.
7. Add herbs and pepper.
8. Spoon vegetables over rice.
9. Spread cheese over vegetables.

Nutty Crumb topping
20g butter, melted
1 cup breadcrumbs
1 ½ cup mixed nuts, chopped (I used ½ cup of almond powder)

10. Mix together topping.
11. Spread evenly over everything else.
12. Bake in a moderate oven (about 180˚C) for 20 minutes, or until golden.

Enjoy!

23 August, 2017

We ate the bitter melon (goya)

So I did it. I cooked up the vegetable that our neighbour gave me last week and I have photos to prove it.


On the left: is Teriyaki Pork Stir Fry (this recipe, though with different vegetables and I also added tofu) the one on the right (and also below) is Cantonese Bitter Melon Omelette.

The stir fry was too salty for our tastes (I never add salt to recipes). The recipe was otherwise very nice, I'm just not sure what to do about the salt, which all came from the soy sauce. Can you buy low-salt soy sauce in Japan?

The omelette I liked, though others didn't necessarily. My husband said that if you had a mixed mouthful of egg and vegetable it was fine, though one of our boys couldn't finish it.


All in all, I'm really pleased. I am not usually any good at stir-fries but this one worked well (aside from the saltiness). Everyone got fed and we received few complaints. I cooked two new recipes and used a new, local vegetable that grew over the road from us.
The goya or bitter melon has an amazing shape and made for photogenic cooking, though I didn't get the focus right on this photo (this was before adding the eggs).

15 August, 2017

Japanese superfood?

Yesterday I received this from one of our neighbours across the street. I was about to leave the house to do some errands on my bike and she was coming out of her garden with two of these in her hand. I rarely see her, so when she asked, "Do you eat these?" I wasn't about to say, "No." I asked her how to cook them and she gave me a simple explanation, then asked if I'd like one. I said we'd give it a try, so now I'm committed!

It is called a Bitter Melon (Goya in Japanese). By the looks of it on Google, it is something of an acquired taste, but it is, apparently, a Japanese "superfood". Has anyone out there got a good recipe for this?

17 April, 2017

Damper recipe

I'm in the mood for writing, but I just have run out of time today. What with church this morning, a magazine design team meeting, baking for three things I had committed to providing snacks for this week, cooking dinner, having a rest, and (yet to come this evening) pricing items for CAJ's twice-annual bazaar, my day is gone.

Let me quickly tell you what I'm making to go with dinner tonight. It is a regular on our menu. We also make a modified version whenever we go camping. It's Australian Damper; very similar to what other countries call soda bread (you can probably help me with other names you might give it).


It's easy and makes for a good addition to a meal. We usually have it with bacon and eggs for dinner. But it also is great spread with butter and a sweet topping like syrup for dessert.


For our hungry family I make this quantity (and get some left over), but you can halve it or freeze leftovers for later:


4 - 4 ½ cups of plain flour (for Japanese flour you need the larger amount)

4 teaspoons baking powder
75g butter (I don't use this the camping)
1 ½ cups of liquid (this can be milk or water or half of each)

1. Rub butter into flour & baking powder mixture using fingers (or a pastry blender, which I love).

2. Add liquid and mix to a soft dough.
3. Shape into a log and place on oven tray.
4. Brush with milk and sprinkle with sesame seeds (latter is optional).  
5. I bake at 200˚C for 15 minutes and then 180˚C for 20-25 minutes (until brown and sounds hollow when tapped). But you'll need to figure out your own oven. I have a fast, hot oven.

09 April, 2017

Self-saucing pudding

I had fun this week by putting the word "pudding" up on my Facebook page and asking my friends, who hale from a variety of backgrounds, how they used this word. I had over 100 responses. This is a summary of what they said:

Americans: it is a smooth, gelatin-type creamy dessert of varying flavours, often based on Jello. Although a handful of exceptions came up: bread pudding, banana pudding, rice pudding, and cottage pudding. Edit: I knew I could get in trouble writing this. My American proofreading friend has said this is wrong. He suggested I put this: "It is a sweet, smooth, milk-based creamy dessert of varying flavours." Other feedback suggests that it is not necessarily made with gelatine or Jello.

Australians: many remember when they were growing up that the sweet course after mains at the evening meal was called "pudding" no matter what it was, but now call that course "dessert". 

British: were split. Some call anything sweet you eat after dinner pudding, some do a similar split to Australians. I believe it is something of a geographical split, but I don't have a clear reference for that. Some also had other things they called pudding, non-sweet things like Yorkshire pudding which goes with roast beef or a steak d kidney pudding.

I got no responses from other English-speaking countries like New Zealand, South Africa, or Singapore.

On Thursday I made chocolate self-saucing pudding (my recipe is here) to share with friends who invited us to dinner on Friday. I have a US friend who is curious about the creation of this dessert, so here are some pictures of the process:

First the cake-like batter went into the dish.

Then I mixed together cocoa and brown sugar.

And sprinkled this over the top of the cake-like batter.

After that I gently poured boiling water over the whole thing.

Finished, it looked like this and then went into the oven.

I neglected to take a photo of the end effort. Actually the dish I used for this was too small (because I'd doubled the recipe and calculated badly on the volume, a common problem for me that makes me a bad packer too). Because it was too small, the final product didn't look great as it had overflowed and baked onto the edge and outside of the dish. 

However it tasted great. On top it looks like a normal-ish cake-like dessert, but when you take out a serving, you find thick chocolate sauce has formed at the bottom (check the recipe I linked to above to see a photo of this). Magic!

25 March, 2017

Chocolate Oat Bars

I made these last weekend and have been getting rave reviews from the two boys at home this week. By great restraint we've managed to keep some for guys who returned from Thailand today, thankfully it's quite a large recipe.


250g butter, melted
440g brown sugar
2 eggs, lightly beaten
2 teaspoons vanilla essence
375g self-raising flour (or plain flour plus 2 ½ teaspoons of baking powder)
3 cups rolled oats

Filling
300g chocolate, chopped
295g can sweetened condensed milk
30g butter, chopped
2 teaspoons vanilla essence
Optional: 120g chopped pecans

1. Preheat the oven to moderate (about 160C for fan forced). Lightly grease two 19cm x 29cm rectangular slice pans (or the equivalent), line with baking paper, ensuring.
2. Combine butter, sugar, eggs, and essence in a large bowl. Add sifted flour and oats; mix well.
3. Divide mixture into three equal portions. Press one portion of mixture evenly over base of one prepared pan (I found this time consuming). Repeat with other pan. Keep aside one portion. Refrigerate while preparing filling.
4. Filling: Combine chocolate, condensend milk, and butter in a small saucepan, stir over low heat for about two minutes or until chocolate is melted. Add essence and nuts, if you are using.
5. Spread filling evenly over both bases. Crumble remaining mixture over filling in both pans. 
6. Bake in a moderate oven for about 30 minutes or until browned. Cool in pans.
7. Refrigerate for several hours before cutting into slices. Either in the pans or out.

19 March, 2017

Fish Pie Recipe

I complained yesterday on Facebook about my two younger sons, who slept in and ate late yesterday (as I did), but then got all grumpy at me when I tried to insist they needed food at midday.

Uncooked pie
I really don't want to leave people with younger children the impression that teens and tweens are really that bad all the time. They have good moments and bad moments, just like younger kids. Although I do find that the good moments are more fun, because they are interacting with you on a level closer to being adult-type conversation and humour.

In any case, one really great thing about my teenage boys is that they love the food I make for them (much better than when they were younger). I get lots of positive response when I feed them food they love, and they like a lot more food than they used to.

Finished product.
The recipe I want to share with you today is my middle son's favourite main meal. It has been for a number of years now. We call it "Fish Pie" but you could call it Tuna Quiche. Whenever I'm making this I get a tremendous amount of "teen love". It has three of my boys' favourite things in it: cheese, eggs, and bacon.

It is a bit fiddly, because it has pastry, but it keeps well (even freezes). Last weekend I tripled the recipe because we had guests and it was great to enjoy the left-over pie last night with no more effort than heating it up in the microwave.

Pastry
1 cup plain flour
80g butter
1 egg
2 teaspoons lemon juice

1. Rub the butter into the flour (or use one of these cool pastry blenders). 
2. Moisten with egg and lemon juice. If it is too dry, then add a little bit more lemon juice. If it is too wet, add a little more flour.
3. Mix until it is a smooth dough, but don't knead for long, especially if the weather is hot.
3. Roll out to an appropriate size and place in greased pie dish. (Some hints for rolling is to use a flexible plastic mat and cover your rolling pin with stockings or tights, unused, of course. And use a good amount of flour to stop everything sticking.)

Filling
1 tin of tuna (no real measurement here, however much you want. You could also use salmon if you prefer that.)
chopped bacon (again, the recipe says two rashers, I usually use much more than that)
1 cup grated cheese
3 eggs
1 cup evaporated milk (or cream, but I never use it, another substitute I've used when I'm out of evaporated milk is ¾ cup milk and 3 tablespoons of water)
pepper if you wish

1. Spread tuna and chopped bacon straight on pastry. 
2. Top with cheese.
3. Beat eggs and evaporated milk together. Pour into pie dish.
4. Bake for 40 minutes at 180˚C. (This is the step I struggle with most, often I find it isn't set in the middle, so I have to cook it for longer or if I'm in a hurry, hasten it along with a stint in the microwave.)

You can double, triple, quadruple this to your heart's content. It cooks faster, though, if you cook it in separate dishes, rather than all in one large dish. Keeps well in the fridge and also freezes well. If you end up with too much pastry, uncooked pastry also freezes well in a ball.


11 March, 2017

Whole Orange cake

I made Whole Orange Cake last weekend. Love this cake! 

The boys have, over the week, given their whole and honest appraisal of the cake. They're not so totally enthusiastic. Their main beef being that the skin of the orange is included in the cake (despite the fact that they eat orange skin in a fruit cake with no problem).

It's super quick and easy, so I thought I'd share it here.

1 medium orange (about 240g)
200g butter, melted
3 eggs, beaten lightly
1 cup (220g) white sugar
1 ½ cups (225g) self-raising flour (or same amount of plain flour plus 1 ½ teaspoon of baking powder)

Icing
2 teaspoons orange juice
2 teaspoons lemon juice
1 cup (160g) icing sugar
Optional: 2 teaspoons orange rind and 2 teaspoons lemon ride

1. Grease a 20cm cake pan, line base with baking paper.
2. Wash and dry orange, cut into quarters, remove any seeds. Process in food processor until it becomes pulpy.
3. Transfer orange to a medium bowl, stir in butter, eggs, sugar, and sifted flour until smooth.
4. Pour mixture into prepared pan. 
5. Bake in a moderate oven (180C/160C fan-forced) for about 50 minutes or until cooked. 
6. Stand for 10 minutes before turning onto a wire rack.
7. Icing: sift icing sugar into a bowl, stir in juices. If it needs a bit more liquid, add a small amount of hot water (1 teaspoon). Stir in rind, if you're using it.
8. Spread citrus icing over cake.

Enjoy!


22 January, 2017

ANZAC Slice became Protein Bars

We've been "running" since Friday morning with little break. Most of it good and some of it exciting, but for now I've got a magazine to check before it goes to the printer tonight, so I thought I'd share a recipe.

In the ongoing effort to provide portable, nutritious food to our wrestlers (and spectators) during meets, I modified a recipe the other day and it worked beautifully. We were packed like sardines into the stands yesterday, so plenty of people around me wanted to try what I'd made and it met with approval everywhere. Deliciously moist and chewy and not crumbly or dry, my ANZAC slice* became a Protein bar.

Here's the usual recipe (from here):

ANZAC Slice

Ingredients:
90g (1 cup) rolled oats
220g (1 cup) brown sugar
65g (¾ cup) desiccated coconut
220g (1 cup) flour
½ teaspoon baking powder
125g butter
2 tablespoons golden syrup (I guess you could substitute honey or maple syrup, or any type of syrup in here, really, though the taste would change)

Method:
1. Heat butter and golden syrup in a small saucepan on low heat for 1-2 minutes, until butter has melted and mixture is well combined.
2. Mix all dry ingredients in a bowl.
3. Add butter mixture to the dry ingredients, combine well.
4. Press firmly into a greased/baking-paper-lined pan (18x28cm) using a fork.
5. Bake for 20-25 minutes in a 180 degree oven, or until golden. (Careful, it can burn quickly.)
6. Cool completely in pan. Cut into required sizes.

To make these into Protein Bars, I did some substituting with what I happened to have in my larder. I reduced the brown sugar a little bit as well as the flour and added in Protein powder (ours is chocolate flavoured and has a bit of sugar in it). I also added Chia seeds and Almond Flour. 

I can't tell you how much I substituted in, I didn't record it as I did it, but I was fairly conservative this time. I didn't have time for this not to work! You could add in sunflower seeds, nuts, even peanut butter and apple sauce (substitutes for butter). Be creative. The texture of the batter should be tacky and pretty easy to work with (not too dry or too sticky). It holds together well, so should hold together whatever you decide to add, as long as you don't add in too much.

They are filling, more so than a usual biscuit, I'd venture to say. Not a substitute for good food, but a slightly more healthy snack. A lot of homemade granola bars need to be kept in the fridge to stay together, but these don't, that's what was particularly attractive to me about them.


*Background: ANZAC is short for Australian and New Zealand Army Corps, see my post here about the special day called ANZAC Day in April. The connection between the war and the biscuits (yes, the Commonwealth-useage of biscuit) is hard to pin down. Here is what Jamie Oliver has to say on it: http://www.jamieoliver.com/news-and-features/features/the-history-of-the-anzac-biscuit/

29 December, 2016

Orange Chicken Recipe

This is a delicious recipe that I've been making for many years now. It brings the most mouthwatering smells into your house.


Today I used 1.2kg of chicken, but the quantity of the sauce ingredients below is only for half that amount, our boys have typically not enjoyed the sauce so I generally have kept it separate to the meat, but they must be growing up because two of the three enjoyed the sauce-coated chicken tonight. Play around with the quantities to meet your needs.

1.2 kg Chicken breasts
8 tablespoons flour (2/3 cup)
1 teaspoon cinnamon
Oil

Sauce
1 cup orange juice
1/2 chopped large onion
1 tablespoon soy sauce
1 tablespoon brown sugar

1. Combine flour and cinnamon in a plastic bag.
2. Cut chicken into pieces, they don't have to be bite-sized. Strips are good.
3. Shake each piece in the bag till coated.
4. Heat oil in frypan. Not much is needed.
5. Fry chicken on both sides till golden brown and cooked through.
6. Remove chicken.
7. Sprinkle some flour/cinnamon mixture in pan with some oil. Mix together well, cooking for a short time.
8. Add sauce mixture. Boil, stirring gently till the onion is cooked.
9. Either serve separately or with sauce poured over chicken. It's lovely with rice.

It took me just over half an hour to make tonight. 

Slow cooker version
If you're into slow cookers and want to make it even faster then try this: Throw everything into the slow cooker except the oil. You don't even need to pre-coat the chicken in flour, just thicken the sauce with cornflour in a saucepan before serving. Pre-cook the onion before putting it in, though. A couple of minutes in the microwave will do the trick. 

28 December, 2016

Fruit Mince Pie Recipe

As I wrote yesterday, I made fruit mince pies while we're away (I also made more yesterday, that makes about four or five dozen!). It's a relatively new tradition in our house. I think I've done this about three Christmases now. It's not something I ever contemplated doing before then, even though I'm totally fine with making sweet short-crust pastry. In Australia it is something I've just bought in the shop.


Below is my pastry recipe (passed down to me by my mum), part of my apple pie recipe. But the quantities I play around with a little. Japanese flour and Australian flour have different gluten contents, so a higher flour to liquid ration is needed (i.e. more flour for the same amount of liquid). So you can either use this amount of flour and liquid and then add in more flour as needed, or start with more flour and add liquid till you get the a good pastry consistency (not sticky, but wet enough to hold together).


I would also argue that the tablespoon of cornflour isn't essential.


The fruit mince I don't have a recipe for. My method this time was to combine apple sauce and orange juice with some mixed fruit (not candied) in a saucepan and cooked them for a short time (I'd have used cinnamon and maybe nutmeg, but I forgot to take them with me). For the first lot I let it soak in the fridge for a couple of days (convenience more than anything) and for yesterday's lot I used the filling straight away. But there are many different recipes online that you can use, if you need one.

Once you have these you need to roll out a portion of the dough as thinly as you can and cut it into circles with an appropriately sized cup/small bowl or container. The tops I made with cookie cutters, but you could also make them circles. The assembly is simple and then I brushed the top with egg.

I baked them in my fan forced oven at 170˚C for 15 minutes yesterday.

20 November, 2016

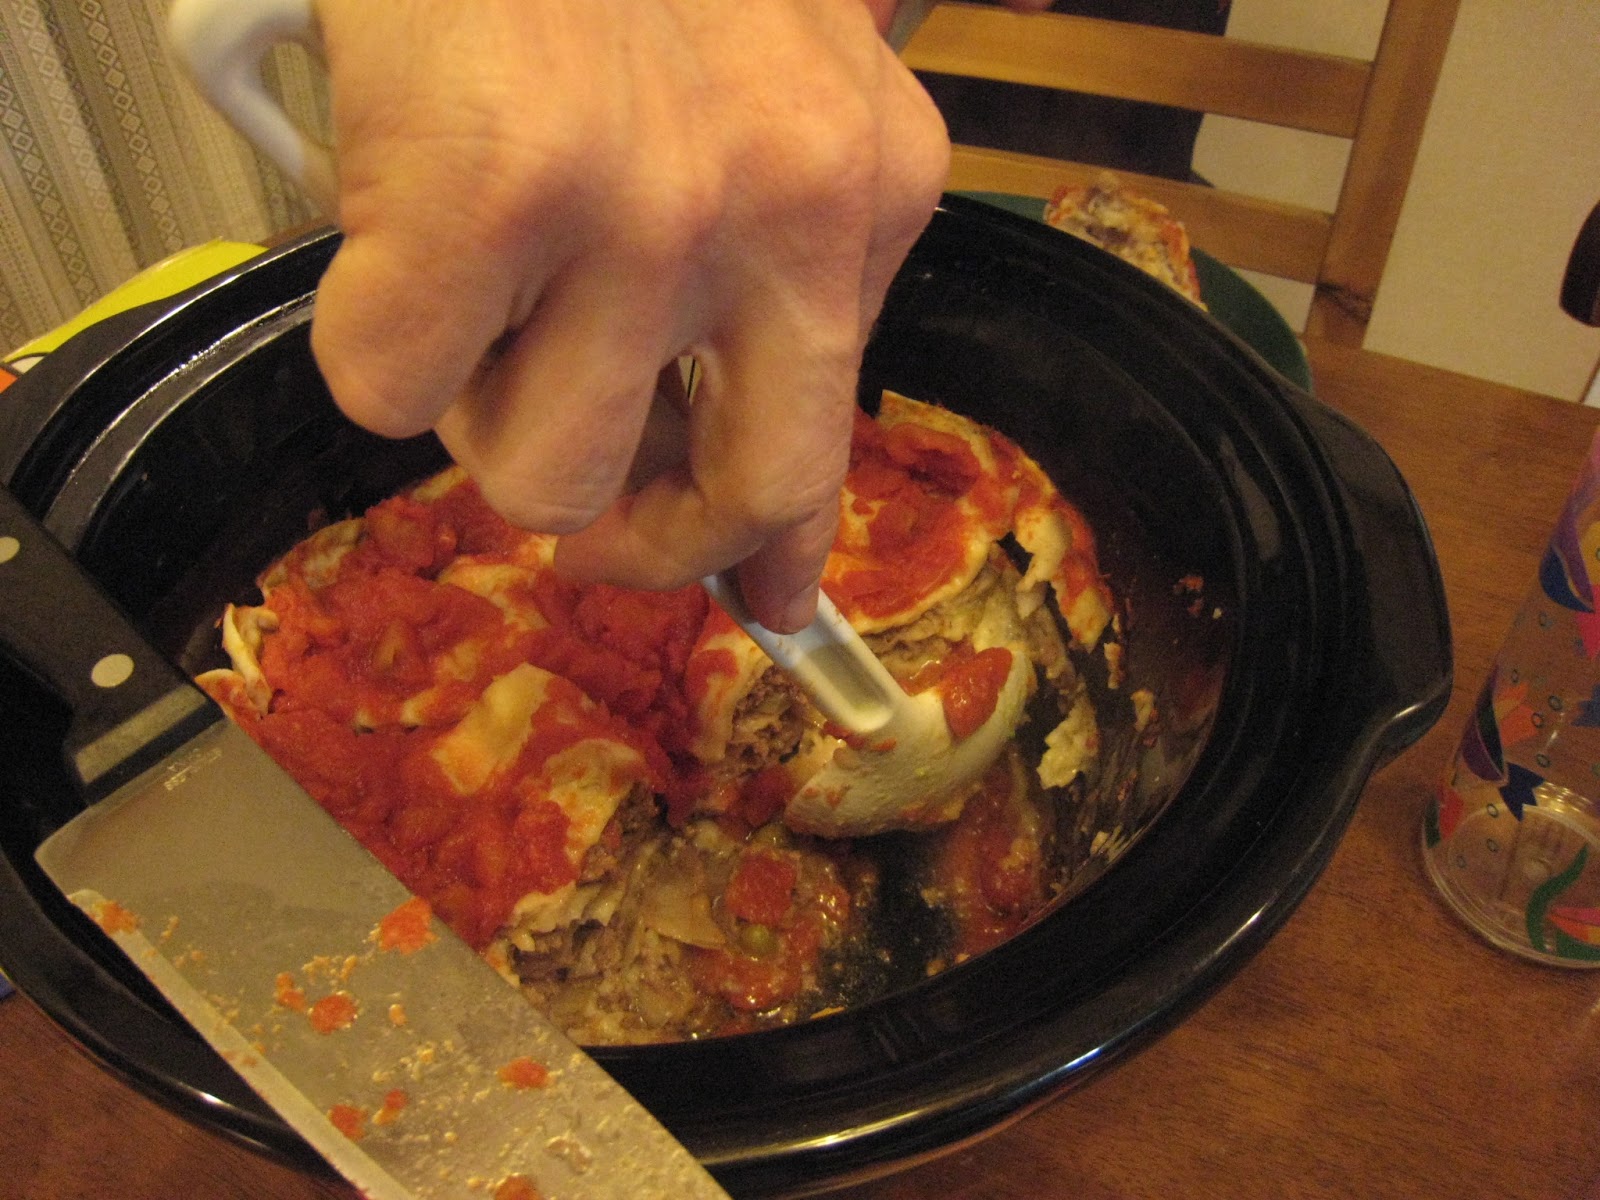
Some easy slow cooker recipes

One of my slow-cooker recipes, but it requires tortillas,
not a common thing to find in Japan (we get ours from Costco).
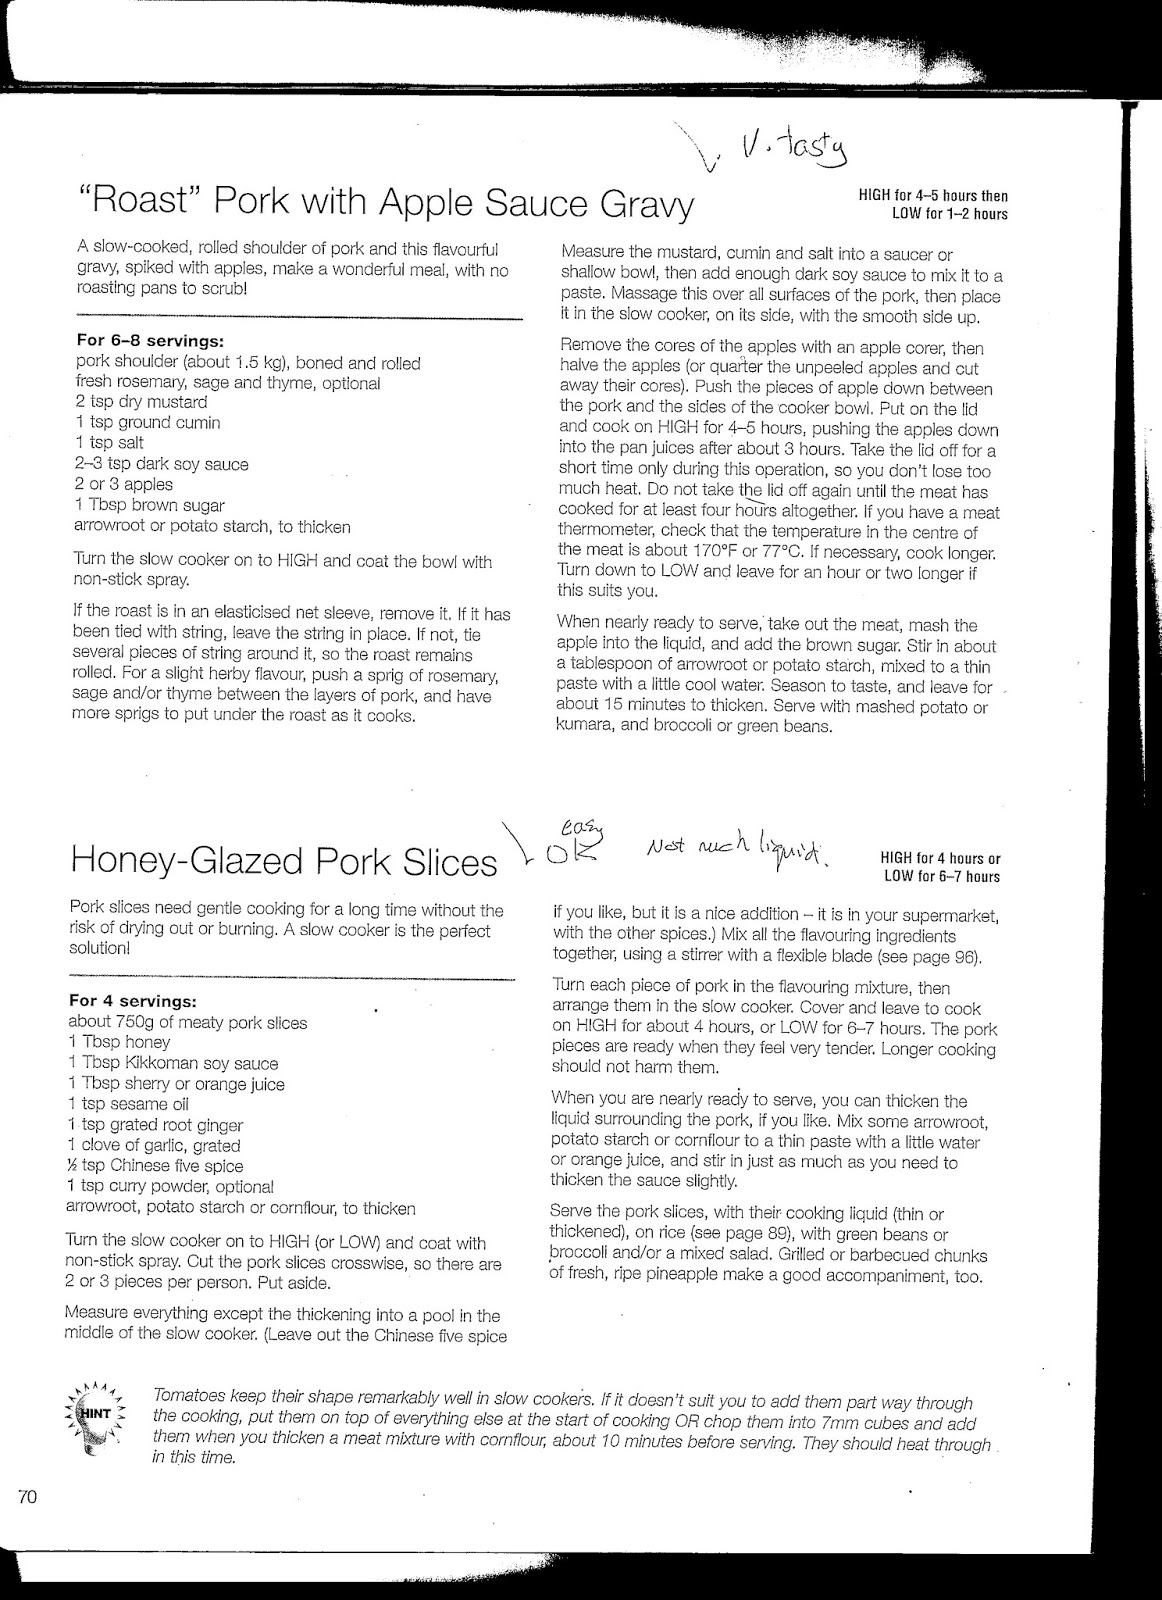
I love my slow cooker! I periodically hear people ask for good low-fuss slow cooker recipes.  Low-fuss cooking is my speciality, so here are some of my favourite slow cooker recipes. I'm sorry they aren't typed out beautifully, I don't have time for that just now. If you can't read the details, email me and I'll send you the full file.


The following recipe is badly written. I basically throw the meat into the slow cooker (gently) and turn it on. Not long before I want to serve I make the BBQ sauce. From there you can add the sauce to the meat in the slow-cooker, or you can serve them separate. This recipe works for any type or meat (I haven't tried fish), and tastes just as good on any type of carb you might like. All in all a very versatile recipe. We ended up with too much BBQ sauce last time and so I bottled the remains, which we've used on pizza bases, sandwiches, etc. It's delicious, with a slight bite.